What Goes Into a Radon Mitigation Cost: A Homeowner's Breakdown
Understanding the Price of Safer Indoor Air
If you have tested your home for radon and the results came back above the EPA action level of 4 pCi/L, the next question is almost always practical. You want to know what this work will cost and why the numbers vary so much from house to house. I have been in enough basements and crawl spaces across St. Louis to tell you that the radon mitigation cost is not a single number you can look up in a catalog. It depends on the construction of your foundation, the type of soil beneath it, and the path the contractor needs to take to create a reliable radon mitigation system.
The good news is that the technology behind radon reduction is well proven. The bad news is that some homes are simply more expensive to fix than others. Let me walk through the main factors that determine the final bill, so you can have an informed conversation when you call a professional like Air Sense Environmental.
The Core Method: Active Soil Depressurization
Almost every residential radon mitigation system installed today relies on active soil depressurization. The principle is straightforward. A radon fan pulls soil gas from beneath the slab or from under a crawl space liner and vents it above the roofline, where the radon stack effect helps it dissipate safely into the outside air. The fan creates a negative pressure zone under the foundation, preventing radon entry points from pushing gas into the living space.
The simplest scenario for an installer is a home with a poured concrete slab and an accessible pipe chase or sump pump pit. In that case, the contractor can often connect the suction point directly to an existing opening. The work might involve drilling a small hole through the slab, setting a pipe into the gravel layer below, sealing around it with a high-quality sealant, and running the pipe to a radon fan mounted on the exterior wall or in the attic. That kind of installation is straightforward and tends to be the most affordable.
The harder scenario is a house with multiple slabs, a finished basement with a dropped ceiling, or a crawl space that is too tight to work in without excavation. When the installer has to cut through a finished floor, fish pipe through confined spaces, or dig outside to reach the sub-slab area, the labor time goes up. And labor is the biggest variable in any radon mitigation cost estimate.
Where the Money Goes: Breaking Down the Parts
To understand the pricing, it helps to think about the components. A typical system includes the radon fan itself, the piping (usually PVC, sized to match the airflow), a manometer or vacuum gauge to show that the system is pulling suction, and the sealant used to close every gap around the pipe penetration. The manometer is a simple U-tube device filled with colored fluid. It gives you a quick visual check that the fan is running and the sub-slab depressurization is working. Some homeowners upgrade to a continuous radon monitor that plugs into a wall outlet and gives a digital reading over time. That is an extra cost but gives you a lot of peace of mind.
The radon fan is the heart of the system. These fans are designed to run continuously for years, and they are surprisingly quiet. A quality fan will cost more upfront but will save you money in the long run because it uses less electricity and lasts longer. Cheaper fans can fail after a few years, and then you are paying for a service call and a replacement. That is one area where trying to cut the radon mitigation cost can backfire.
The Foundation Factor
In St. Louis, we see a mix of construction types. Older homes often have crawl spaces with dirt floors. A crawl space requires a different approach. The contractor typically lays a heavy-duty reinforced membrane over the soil, seals it to the walls and piers, and vents the space under the membrane with a fan. That is more labor and more material than a simple slab installation. If the crawl space is very low and the installer has to crawl on their belly to pull the liner and apply sealant, the price goes up accordingly.
Homes built with radon-resistant new construction features are easier and cheaper to retrofit. If the builder already placed a layer of clean gravel, a vapor barrier, and a passive vent pipe through the slab, the mitigation contractor can often activate that passive system by adding a fan. That is the best possible scenario for your budget. Unfortunately, most homes in the area were built before radon codes were common, so the installer is starting from scratch.
Testing Before and After
Before any work begins, you need a reliable measurement of the radon level in your home. You can buy a radon test kit at a hardware store or online. These short-term tests are inexpensive and give you a snapshot. But if you want a more accurate picture, a continuous radon monitor that sits in your home for several days will give you hourly readings and smooth out the daily fluctuations. Many mitigation companies include a pre-mitigation test in their quote, and they always perform a post-installation verification test to confirm that the system is working. Post-installation verification is not an upsell. It is the only way to know that the system actually reduced the radon level below the action level. A responsible contractor will not leave until that test comes back clear.
Some homeowners ask whether they can skip the post-test to save money. I would not recommend it. Without that verification, you have no proof that the system is doing its job. A manometer reading tells you the fan is running, but it does not tell you the radon concentration in your air. The only way to confirm that is with another radon test.
Regional Price Differences and the St. Louis Market
Labor rates vary by region. In St. Louis, the cost of living is moderate compared to coastal cities, and that shows in the pricing for mitigation services. A typical single-family home with a straightforward slab installation will fall into a range that most homeowners find reasonable. The same job in a city with higher overhead and more restrictive permitting could cost significantly more. That is one reason you should get quotes from local companies that know the area. Air Sense Environmental, for example, works in St. Louis every day and understands the common foundation types, the local soil conditions, and the permitting requirements.
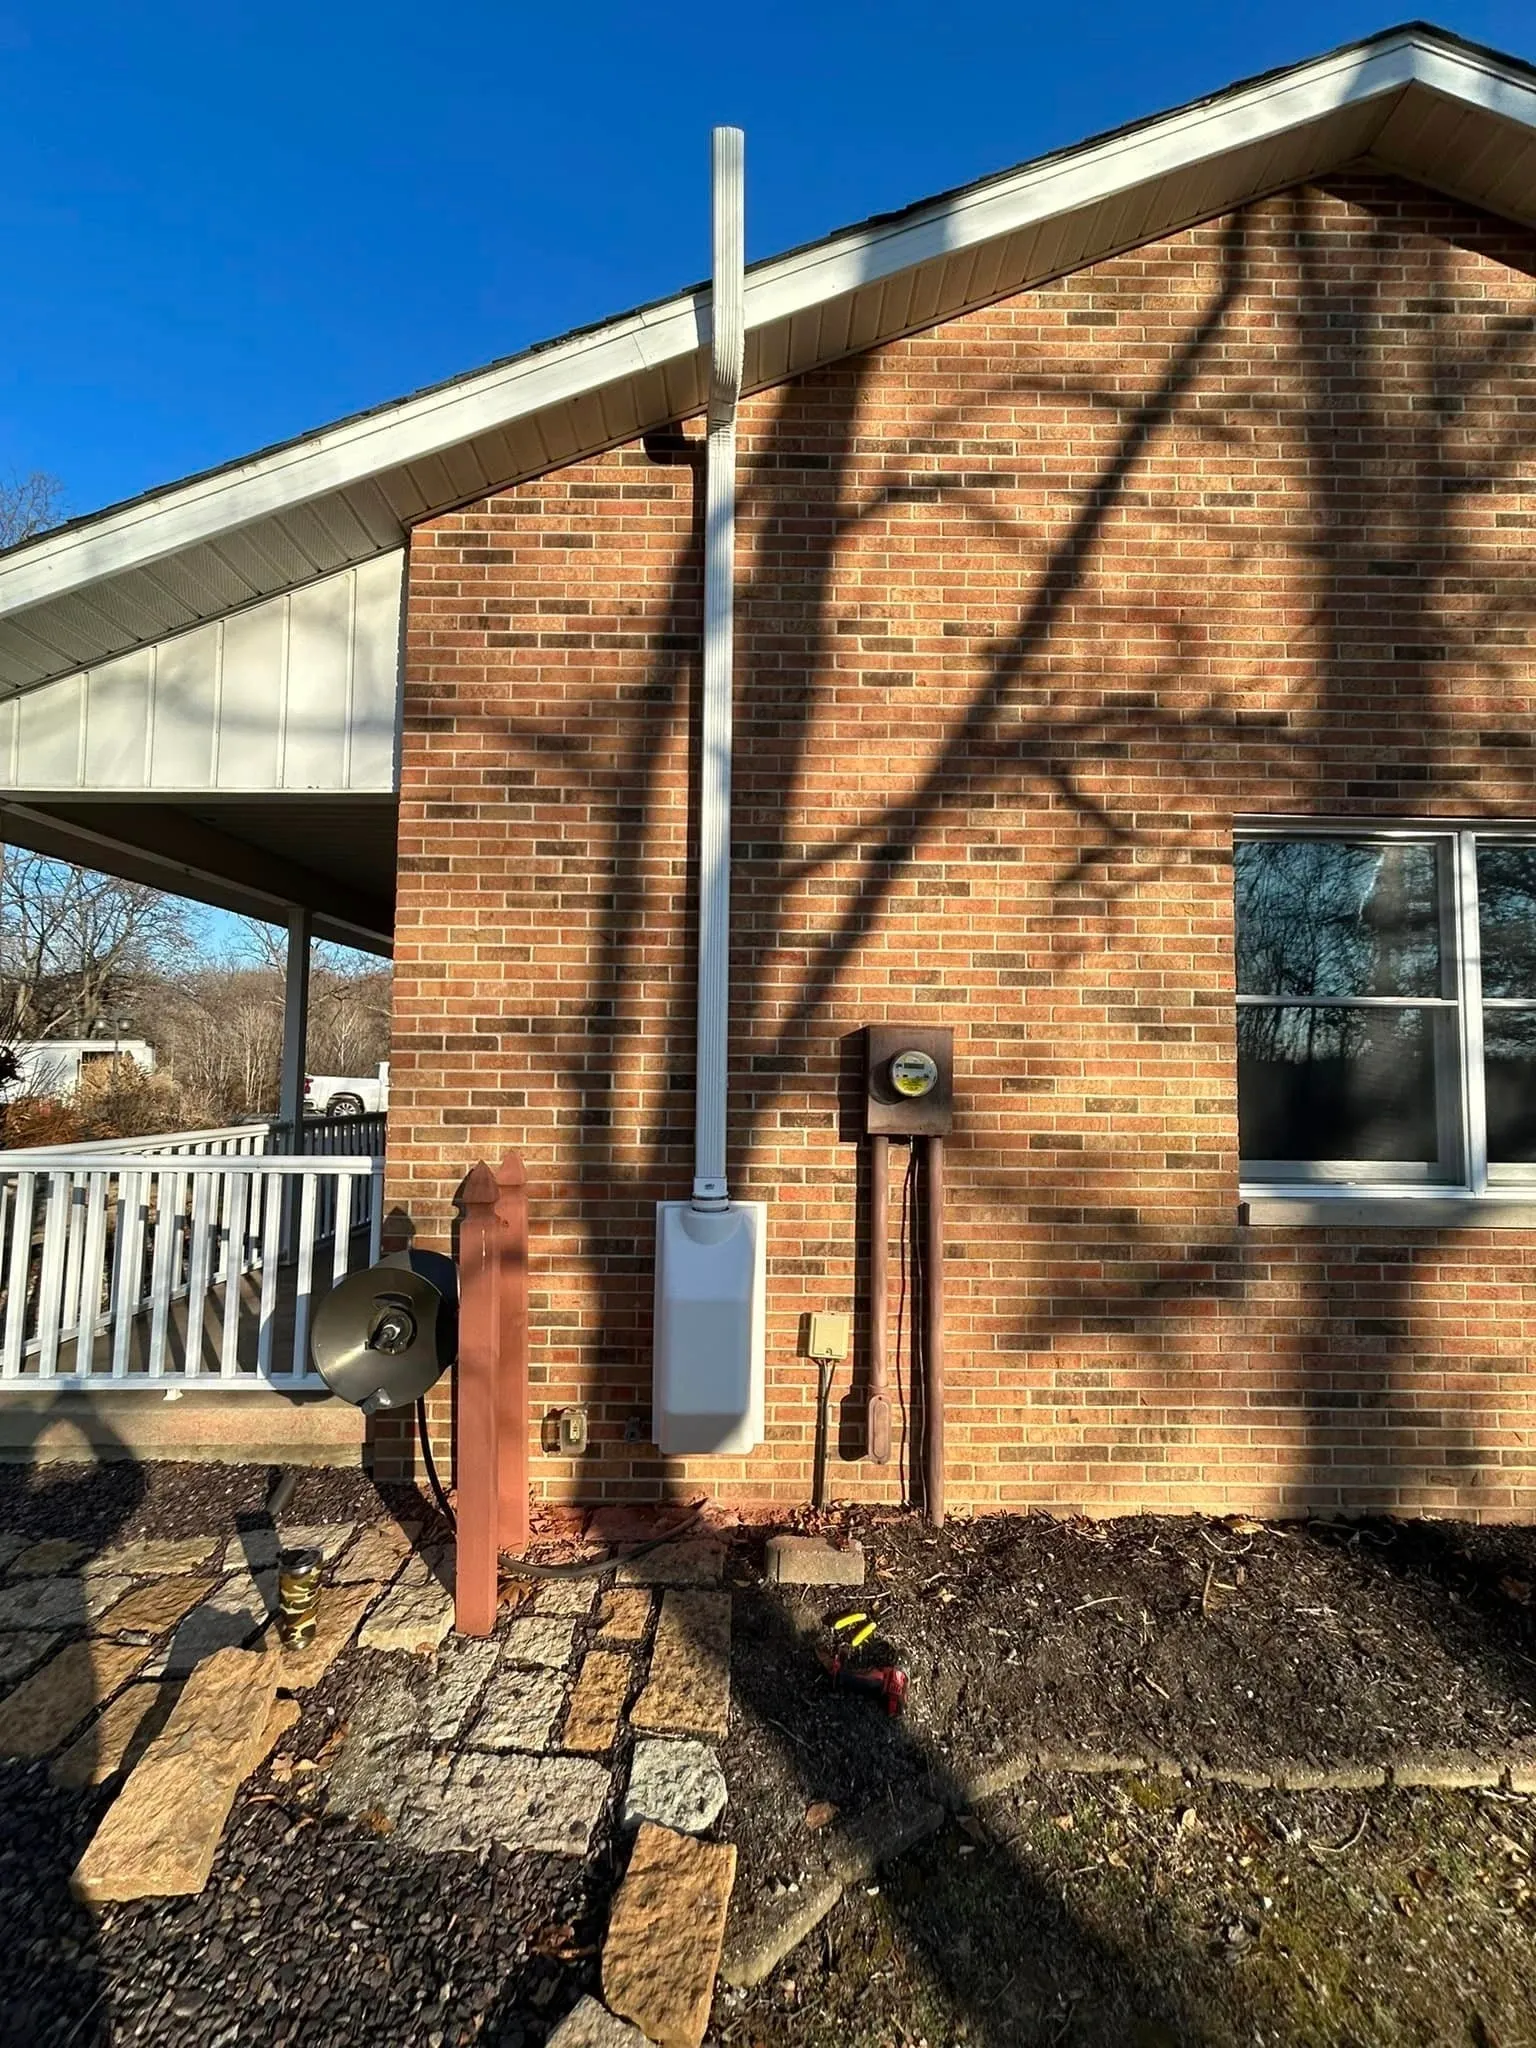
When you call for an estimate, the contractor will ask about your home's foundation, the radon test results, and any unusual features like a sump pump, a finished basement, or multiple heating and cooling zones. They may also ask about the location of the electrical panel, because the radon fan needs power. All of these details feed into the final radon mitigation cost. A good contractor will give you a firm price before they start, not a range that changes after they show up.
Long-Term Value vs. Upfront Price
It is tempting to focus only on the upfront price, but a radon mitigation system is a long-term investment in your home and your health. The system should run silently for years with minimal maintenance. The main things to watch are the manometer fluid level and the condition of the exterior vent. If the pipe gets blocked by snow, leaves, or an animal nest, the fan cannot pull soil gas out effectively. That is a simple check you can do yourself once a month.
The cost of electricity to run a typical radon fan is very low, often less than ten dollars a year. So the ongoing expense is almost zero. The real question is whether the system was installed correctly the first time. A poorly sealed pipe penetration or a fan that is undersized for the house will waste your money and may not reduce radon levels at all. That is why you want an installer who uses quality materials, tests the system thoroughly, and stands behind their work.
When Mitigation Gets More Complex
Some homes present unique challenges. If you have a basement with a sump pump that handles groundwater, the contractor needs to integrate the radon system with the sump pump pit without interfering with the pump's operation. That takes careful planning. If your home has multiple foundation sections at different levels, you may need more than one suction point. That adds piping and possibly a second fan. In extreme cases, the soil gas is so permeable or the radon levels are so high that the contractor needs to install a larger fan or multiple fans. Those are the jobs where the radon mitigation cost climbs noticeably.
But even in complex homes, the basic physics is the same. You are creating a low-pressure zone under the house and venting the gas above the roof. The method is the same. The variables are just the number of suction points and the difficulty of running the pipe.
Final Thoughts on Making Your Decision
If your test results came back above 4 pCi/L, do not wait. Radon is a radioactive gas that decays into particles that can damage lung tissue over time. The EPA recommends mitigation at any level above the action level, and the sooner you act, the less your cumulative exposure. The radon mitigation cost is a fraction of what you would spend on many other home repairs, and it directly protects your family's health.
When you get quotes, ask what is included. Does the price cover the pre-mitigation test, the post-installation verification, the manometer, the sealant, and the fan? Does it include any necessary electrical work? What warranty does the company offer on the fan and the labor? A clear answer to those questions will tell you whether you are comparing apples to apples.
In my experience, homeowners who invest in a quality radon mitigation system from a reputable company like Air Sense Environmental never regret it. The peace of mind that comes from knowing your indoor air is safe is worth the price. And the cost itself, when broken down into the components of labor, materials, and testing, is a transparent and reasonable expense for the protection it provides.